300x250
안드로이드 코틀린으로 네이버 지도 SDK를 사용해서 네이버 지도를 구현해보자.
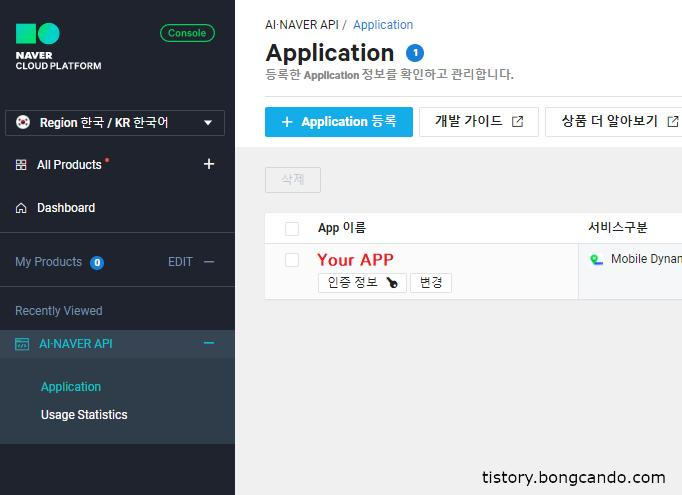
1. 먼저, ☞ 네이버 클라우드 플랫폼에 가입해서 어플리케이션 등록을 한다.

2. 의존성 추가
루트 프로젝트의 build.gradle에 에 저장소 설정을 추가한다.
allprojects {
    repositories {
        google()
        jcenter()
        maven {
            url 'https://navercorp.bintray.com/maps' // naver map
        }

    }
}
그리고 앱 모듈의 build.gradle에 네이버 지도 SDK에 대한 의존성을 선언한다.
implementation 'com.naver.maps:map-sdk:3.5.0' // naver map
3. 클라이언트 ID 지정
발급받은 클라이언트 ID를 SDK에 지정하면 지도 API를 사용할 수 있다.
클라이언트 ID는 두 가지 방식으로 지정할 수 있고 둘 중 편한것으로 하면 된다.
1. AndroidManifest.xml에 지정
AndroidManifest.xml의 <application> 아래에 <meta-data>를 추가하고 아래와 같이 입력한다. value에는 자신이 등록한 Application의 Client ID를 입력한다.
<application>
        <meta-data
                android:name="com.naver.maps.map.CLIENT_ID"
                android:value="Your Client ID" />
</application>
2. API를 호출해 지정
AndroidManifest.xml을 수정하지 않고 API를 호출해 클라이언트 ID를 지정할 수도 있다.
Activity의 onCreate()내에서 NaverMapSdk클래스의 getInstance()를 호출 후 NaverMapSdk.NaverCloudPlatformClient()를 전달한다.
NaverMapSdk.getInstance(this).client = NaverMapSdk.NaverCloudPlatformClient("Your Client ID")
4. 지도 표시
지도 화면은 프래그먼트 및 뷰로 제공되지만 이 중 권장되는 방법은 MapFragment를 사용하는 것이다.
아래의 예제는 MapFragment를 사용하였고 <com.naver.maps.map.MapView>로도 네이버 지도를 화면에 표시할 수 있다.
<?xml version="1.0" encoding="utf-8"?>
<androidx.constraintlayout.widget.ConstraintLayout
        xmlns:android="http://schemas.android.com/apk/res/android"
        xmlns:app="http://schemas.android.com/apk/res-auto"
        xmlns:tools="http://schemas.android.com/tools"
        android:layout_width="match_parent"
        android:layout_height="match_parent">

	<!--naver map-->
    <fragment
            android:id="@+id/main_mapView"
            android:layout_width="0dp"
              android:layout_height="0dp"
              android:name="com.naver.maps.map.MapFragment"
              app:layout_constraintTop_toBottomOf="@id/main_toolbar"
              app:layout_constraintLeft_toLeftOf="parent"
              app:layout_constraintRight_toRightOf="parent"
              app:layout_constraintBottom_toBottomOf="parent"/>

</androidx.constraintlayout.widget.ConstraintLayout>
mainActivity.xml

Reference
320x100
'안드로이드 > 코틀린(Kotlin)' 카테고리의 다른 글
| [Android : Kotlin] 뒤로가기 두번으로 앱 종료하기 with SnackBar (0) | 2019.09.27 |
|---|---|
| [Android : Kotlin] TextInputLayout을 사용해서 EditText를 꾸며보자 (0) | 2019.09.22 |
| [Android : Kotlin] Navigation Drawer를 사용해서 메뉴를 만들어보자 (15) | 2019.09.09 |
| [Android : Kotlin] Firebase를 연동하여 구글(Google) 로그인을 구현해보자 (10) | 2019.08.29 |
| [Android : Kotlin] 스플래시(Splash)화면을 만들어보자 (2) | 2019.08.18 |